Tech

gouach-wants-you-to-insert-and-pluck-the-cells-from-its-infinite-e-bike-battery

Gouach wants you to insert and pluck the cells from its Infinite e-bike battery

“It was really a setback for the company [Gouach] at the time,” Vallette said. “But we knew that the technology itself was good, so we designed our own casing.” Gouach’s casing is now rated IP67, Vallette said, and meets UL 2271 standards.

Gouach’s video demonstrating its battery case’s fire resistance.

Unexpected resistance

There are three avenues for selling the Infinite Battery, as Vallette sees it. One is working with e-bike makers to incorporate Gouach’s tech. Another is targeting e-bike owners and small bike shops who, this far into e-bikes’ history, might be dealing with dead batteries. And then there are folks looking to build their own e-bikes.

The Infinite Battery will be made available in 36 V and 48 V builds, and Gouach’s app promises to help owners connect it to a wide variety of bikes. Actually fitting the battery case onto your bike is a different matter. Some bikes can accommodate the Gouach kit where their current battery sits, while others may end up mounting to a rack, or through creative, but hopefully secure, frame attachments.

One of the biggest compatibility challenges, Vallette said, was finding a way to work with Bosch’s mid-drive motors. The communications between a Bosch motor and battery are encrypted; after “a serious effort,” Gouach’s app and battery should work with them, Vallette said.

Gouach, having raised more than $220,000 on crowdfunding platform Indiegogo from about 500 backers, and $3.5 million in venture funding, is getting close to offering the batteries through its own storefront. Gouach’s roadmap puts them in mass production at the moment, with assorted bugs, certifications, and other matters to clear. EU-based backers should get their kits in June, with the US, and an open online store, to follow, barring whatever happens next in international trade. Vallette said in mid-May that the US’s momentary 145 percent tariffs on Chinese imports disrupted their plans, but work was underway.

If nothing else, Gouach’s DIY kit shows that a different way of thinking about e-bike batteries—as assemblages, not huge all-in-one consumables—is possible.

Gouach wants you to insert and pluck the cells from its Infinite e-bike battery Read More »

steamos-3.7-brings-valve’s-gaming-os-to-other-handhelds-and-generic-amd-pcs

SteamOS 3.7 brings Valve’s gaming OS to other handhelds and generic AMD PCs

Valve’s instructions will walk you through downloading a SteamOS recovery image and copying it to a USB drive using either the Rufus tool (on Windows) or Balena Etcher (the preferred macOS and Linux utility). After turning Secure Boot off, you should be able to boot from the USB drive and install SteamOS as you would on a regular Steam Deck.

Note that there’s no simple, officially supported way to dual-boot SteamOS and Windows; if you decide to turn your handheld, laptop, or desktop into a new Steam Machine, the only way to make it back into a Windows PC is to re-enable Secure Boot and install a fresh copy from another USB drive.

The SteamOS 3.7 update (officially, version 3.7.8) also includes a bunch of other updates to the underlying software: version 6.11 of the Linux kernel (up from version 6.5 in SteamOS 3.6), “a newer Arch Linux base,” version 6.2.5 of the Plasma interface in desktop mode, new Mesa graphics drivers, and various other tweaks and bug fixes.

A second act for SteamOS

The original version of SteamOS was designed to be widely compatible with all kinds of PC hardware and was available both from major PC manufacturers and as a standalone OS that you could (and which we did) install on custom, self-built PCs. But these computers and that version of SteamOS mostly flopped, at least in part because they only ran a small subset of games that natively supported Linux.

The current version of SteamOS launched with more modest aims as the first-party operating system for a single piece of hardware. But by focusing on the game compatibility problem first and leading the way with category-defining hardware, Valve has actually built a much stronger foundation for the current version of SteamOS than it did for the original.

That doesn’t make SteamOS a drop-in replacement for Windows—without strong support for Intel or Nvidia hardware, it’s not a great candidate for the majority of gaming PCs, or even Intel-powered gaming handhelds like the MSI Claw A1M. And Windows is set up to be a multi-purpose general-use operating system in ways that SteamOS isn’t; Valve still says that, despite the presence of desktop mode, “users should not consider SteamOS as a replacement for their desktop operating system.” But for certain kinds of systems that are primarily used as gaming PCs, SteamOS is a real contender.

SteamOS 3.7 brings Valve’s gaming OS to other handhelds and generic AMD PCs Read More »

in-35-years,-notepad.exe-has-gone-from-“barely-maintained”-to-“it-writes-for-you”

In 3.5 years, Notepad.exe has gone from “barely maintained” to “it writes for you”

By late 2021, major updates for Windows’ built-in Notepad text editor had been so rare for so long that a gentle redesign and a handful of new settings were rated as a major update. New updates have become much more common since then, but like the rest of Windows, recent additions have been overwhelmingly weighted in the direction of generative AI.

In November, Microsoft began testing an update that allowed users to rewrite or summarize text in Notepad using generative AI. Another preview update today takes it one step further, allowing you to write AI-generated text from scratch with basic instructions (the feature is called Write, to differentiate it from the earlier Rewrite).

Like Rewrite and Summarize, Write requires users to be signed into a Microsoft Account, because using it requires you to use your monthly allotment of Microsoft’s AI credits. Per this support page, users without a paid Microsoft 365 subscription get 15 credits per month. Subscribers with Personal and Family subscriptions get 60 credits per month instead.

Microsoft notes that all AI features in Notepad can be disabled in the app’s settings, and obviously, they won’t be available if you use a local account instead of a Microsoft Account.

Microsoft is also releasing preview updates for Paint and Snipping Tool, two other bedrock Windows apps that hadn’t seen much by way of major updates before the Windows 11 era. Paint’s features are also mostly AI-related, including a “sticker generator” and an AI-powered smart select tool “to help you isolate and edit individual elements in your image.” A new “welcome experience” screen that appears the first time you launch the app will walk you through the (again, mostly AI-related) new features Microsoft has added to Paint in the last couple of years.

In 3.5 years, Notepad.exe has gone from “barely maintained” to “it writes for you” Read More »

what-i-learned-from-my-first-few-months-with-a-bambu-lab-a1-3d-printer,-part-1

What I learned from my first few months with a Bambu Lab A1 3D printer, part 1


One neophyte’s first steps into the wide world of 3D printing.

The hotend on my Bambu Lab A1 3D printer. Credit: Andrew Cunningham

The hotend on my Bambu Lab A1 3D printer. Credit: Andrew Cunningham

For a couple of years now, I’ve been trying to find an excuse to buy a decent 3D printer.

Friends and fellow Ars staffers who had them would gush about them at every opportunity, talking about how useful they can be and how much can be printed once you get used to the idea of being able to create real, tangible objects with a little time and a few bucks’ worth of plastic filament.

But I could never quite imagine myself using one consistently enough to buy one. Then, this past Christmas, my wife forced the issue by getting me a Bambu Lab A1 as a present.

Since then, I’ve been tinkering with the thing nearly daily, learning more about what I’ve gotten myself into and continuing to find fun and useful things to print. I’ve gathered a bunch of thoughts about my learning process here, not because I think I’m breaking new ground but to serve as a blueprint for anyone who has been on the fence about Getting Into 3D Printing. “Hyperfixating on new hobbies” is one of my go-to coping mechanisms during times of stress and anxiety, and 3D printing has turned out to be the perfect combination of fun, practical, and time-consuming.

Getting to know my printer

My wife settled on the Bambu A1 because it’s a larger version of the A1 Mini, Wirecutter’s main 3D printer pick at the time (she also noted it was “hella on sale”). Other reviews she read noted that it’s beginner-friendly, easy to use, and fun to tinker with, and it has a pretty active community for answering questions, all assessments I agree with so far.

Note that this research was done some months before Bambu earned bad headlines because of firmware updates that some users believe will lead to a more locked-down ecosystem. This is a controversy I understand—3D printers are still primarily the realm of DIYers and tinkerers, people who are especially sensitive to the closing of open ecosystems. But as a beginner, I’m already leaning mostly on the first-party tools and built-in functionality to get everything going, so I’m not really experiencing the sense of having “lost” features I was relying on, and any concerns I did have are mostly addressed by Bambu’s update about its update.

I hadn’t really updated my preconceived notions of what home 3D printing was since its primordial days, something Ars has been around long enough to have covered in some depth. I was wary of getting into yet another hobby where, like building your own gaming PC, fiddling with and maintaining the equipment is part of the hobby. Bambu’s printers (and those like them) are capable of turning out fairly high-quality prints with minimal fuss, and nothing will draw you into the hobby faster than a few successful prints.

Basic terminology

Extrusion-based 3D printers (also sometimes called “FDM,” for “fused deposition modeling”) work by depositing multiple thin layers of melted plastic filament on a heated bed. Credit: Andrew Cunningham

First things first: The A1 is what’s called an “extrusion” printer, meaning that it functions by melting a long, slim thread of plastic (filament) and then depositing this plastic onto a build plate seated on top of a heated bed in tens, hundreds, or even thousands of thin layers. In the manufacturing world, this is also called “fused deposition modeling,” or FDM. This layer-based extrusion gives 3D-printed objects their distinct ridged look and feel and is also why a 3D printed piece of plastic is less detailed-looking and weaker than an injection-molded piece of plastic like a Lego brick.

The other readily available home 3D printing technology takes liquid resin and uses UV light to harden it into a plastic structure, using a process called “stereolithography” (SLA). You can get inexpensive resin printers in the same price range as the best cheap extrusion printers, and the SLA process can create much more detailed, smooth-looking, and watertight 3D prints (it’s popular for making figurines for tabletop games). Some downsides are that the print beds in these printers are smaller, resin is a bit fussier than filament, and multi-color printing isn’t possible.

There are two main types of home extrusion printers. The Bambu A1 is a Cartesian printer, or in more evocative and colloquial terms, a “bed slinger.” In these, the head of the printer can move up and down on one or two rails and from side to side on another rail. But the print bed itself has to move forward and backward to “move” the print head on the Y axis.

More expensive home 3D printers, including higher-end Bambu models in the P- and X-series, are “CoreXY” printers, which include a third rail or set of rails (and more Z-axis rails) that allow the print head to travel in all three directions.

The A1 is also an “open-bed” printer, which means that it ships without an enclosure. Closed-bed printers are more expensive, but they can maintain a more consistent temperature inside and help contain the fumes from the melted plastic. They can also reduce the amount of noise coming from your printer.

Together, the downsides of a bed-slinger (introducing more wobble for tall prints, more opportunities for parts of your print to come loose from the plate) and an open-bed printer (worse temperature, fume, and dust control) mainly just mean that the A1 isn’t well-suited for printing certain types of plastic and has more potential points of failure for large or delicate prints. My experience with the A1 has been mostly positive now that I know about those limitations, but the printer you buy could easily change based on what kinds of things you want to print with it.

Setting up

Overall, the setup process was reasonably simple, at least for someone who has been building PCs and repairing small electronics for years now. It’s not quite the same as the “take it out of the box, remove all the plastic film, and plug it in” process of setting up a 2D printer, but the directions in the start guide are well-illustrated and clearly written; if you can put together prefab IKEA furniture, that’s roughly the level of complexity we’re talking about here. The fact that delicate electronics are involved might still make it more intimidating for the non-technical, but figuring out what goes where is fairly simple.

The only mistake I made while setting the printer up involved the surface I initially tried to put it on. I used a spare end table, but as I discovered during the printer’s calibration process, the herky-jerky movement of the bed and print head was way too much for a little table to handle. “Stable enough to put a lamp on” is not the same as “stable enough to put a constantly wobbling contraption” on—obvious in retrospect, but my being new to this is why this article exists.

After some office rearrangement, I was able to move the printer to my sturdy L-desk full of cables and other doodads to serve as ballast. This surface was more than sturdy enough to let the printer complete its calibration process—and sturdy enough not to transfer the printer’s every motion to our kid’s room below, a boon for when I’m trying to print something after he has gone to bed.

The first-party Bambu apps for sending files to the printer are Bambu Handy (for iOS/Android, with no native iPad version) and Bambu Studio (for Windows, macOS, and Linux). Handy works OK for sending ready-made models from MakerWorld (a mostly community-driven but Bambu-developer repository for 3D printable files) and for monitoring prints once they’ve started. But I’ll mostly be relaying my experience with Bambu Studio, a much more fully featured app. Neither app requires sign-in, at least not yet, but the path of least resistance is to sign into your printer and apps with the same account to enable easy communication and syncing.

Bambu Studio: A primer

Bambu Studio is what’s known in the hobby as a “slicer,” software that takes existing 3D models output by common CAD programs (Tinkercad, FreeCAD, SolidWorks, Autodesk Fusion, others) and converts them into a set of specific movement instructions that the printer can follow. Bambu Studio allows you to do some basic modification of existing models—cloning parts, resizing them, adding supports for overhanging bits that would otherwise droop down, and a few other functions—but it’s primarily there for opening files, choosing a few settings, and sending them off to the printer to become tangible objects.

Bambu Studio isn’t the most approachable application, but if you’ve made it this far, it shouldn’t be totally beyond your comprehension. For first-time setup, you’ll choose your model of printer (all Bambu models and a healthy selection of third-party printers are officially supported), leave the filament settings as they are, and sign in if you want to use Bambu’s cloud services. These sync printer settings and keep track of the models you save and download from MakerWorld, but a non-cloud LAN mode is available for the Bambu skeptics and privacy-conscious.

For any newbie, pretty much all you need to do is connect your printer, open a .3MF or .STL file you’ve downloaded from MakerWorld or elsewhere, select your filament from the drop-down menu, click “slice plate,” and then click “print.” Things like the default 0.4 mm nozzle size and Bambu’s included Textured PEI Build Plate are generally already factored in, though you may need to double-check these selections when you open a file for the first time.

When you slice your build plate for the first time, the app will spit a pile of numbers back at you. There are two important ones for 3D printing neophytes to track. One is the “total filament” figure, which tells you how many grams of filament the printer will use to make your model (filament typically comes in 1 kg spools, and the printer generally won’t track usage for you, so if you want to avoid running out in the middle of the job, you may want to keep track of what you’re using). The second is the “total time” figure, which tells you how long the entire print will take from the first calibration steps to the end of the job.

Selecting your filament and/or temperature presets. If you have the Automatic Material System (AMS), this is also where you’ll manage multicolor printing. Andrew Cunningham

When selecting filament, people who stick to Bambu’s first-party spools will have the easiest time, since optimal settings are already programmed into the app. But I’ve had almost zero trouble with the “generic” presets and the spools of generic Inland-branded filament I’ve bought from our local Micro Center, at least when sticking to PLA (polylactic acid, the most common and generally the easiest-to-print of the different kinds of filament you can buy). But we’ll dive deeper into plastics in part 2 of this series.

I won’t pretend I’m skilled enough to do a deep dive on every single setting that Bambu Studio gives you access to, but here are a few of the odds and ends I’ve found most useful:

  • The “clone” function, accessed by right-clicking an object and clicking “clone.” Useful if you’d like to fit several copies of an object on the build plate at once, especially if you’re using a filament with a color gradient and you’d like to make the gradient effect more pronounced by spreading it out over a bunch of prints.
  • The “arrange all objects” function, the fourth button from the left under the “prepare” tab. Did you just clone a bunch of objects? Did you delete an individual object from a model because you didn’t need to print that part? Bambu Studio will arrange everything on your build plate to optimize the use of space.
  • Layer height, located in the sidebar directly beneath “Process” (which is directly underneath the area where you select your filament. For many functional parts, the standard 0.2 mm layer height is fine. Going with thinner layer heights adds to the printing time but can preserve more detail on prints that have a lot of it and slightly reduce the visible layer lines that give 3D-printed objects their distinct look (for better or worse). Thicker layer heights do the opposite, slightly reducing the amount of time a model takes to print but preserving less detail.
  • Infill percentage and wall loops, located in the Strength tab beneath the “Process” sidebar item. For most everyday prints, you don’t need to worry about messing with these settings much; the infill percentage determines the amount of your print’s interior that’s plastic and the part that’s empty space (15 percent is a good happy medium most of the time between maintaining rigidity and overusing plastic). The number of wall loops determines how many layers the printer uses for the outside surface of the print, with more walls using more plastic but also adding a bit of extra strength and rigidity to functional prints that need it (think hooks, hangers, shelves and brackets, and other things that will be asked to bear some weight).

My first prints

A humble start: My very first print was a wall bracket for the remote for my office’s ceiling fan. Credit: Andrew Cunningham

When given the opportunity to use a 3D printer, my mind went first to aggressively practical stuff—prints for organizing the odds and ends that eternally float around my office or desk.

When we moved into our current house, only one of the bedrooms had a ceiling fan installed. I put up remote-controlled ceiling fans in all the other bedrooms myself. And all those fans, except one, came with a wall-mounted caddy to hold the remote control. The first thing I decided to print was a wall-mounted holder for that remote control.

MakerWorld is just one of several resources for ready-made 3D-printable files, but the ease with which I found a Hampton Bay Ceiling Fan Remote Wall Mount is pretty representative of my experience so far. At this point in the life cycle of home 3D printing, if you can think about it and it’s not a terrible idea, you can usually find someone out there who has made something close to what you’re looking for.

I loaded up my black roll of PLA plastic—generally the cheapest, easiest-to-buy, easiest-to-work-with kind of 3D printer filament, though not always the best for prints that need more structural integrity—into the basic roll-holder that comes with the A1, downloaded that 3MF file, opened it in Bambu Studio, sliced the file, and hit print. It felt like there should have been extra steps in there somewhere. But that’s all it took to kick the printer into action.

After a few minutes of warmup—by default, the A1 has a thorough pre-print setup process where it checks the levelness of the bed and tests the flow rate of your filament for a few minutes before it begins printing anything—the nozzle started laying plastic down on my build plate, and inside of an hour or so, I had my first 3D-printed object.

Print No. 2 was another wall bracket, this time for my gaming PC’s gamepad and headset. Credit: Andrew Cunningham

It wears off a bit after you successfully execute a print, but I still haven’t quite lost the feeling of magic of printing out a fully 3D object that comes off the plate and then just exists in space along with me and all the store-bought objects in my office.

The remote holder was, as I’d learn, a fairly simple print made under near-ideal conditions. But it was an easy success to start off with, and that success can help embolden you and draw you in, inviting more printing and more experimentation. And the more you experiment, the more you inevitably learn.

This time, I talked about what I learned about basic terminology and the different kinds of plastics most commonly used by home 3D printers. Next time, I’ll talk about some of the pitfalls I ran into after my initial successes, what I learned about using Bambu Studio, what I’ve learned about fine-tuning settings to get good results, and a whole bunch of 3D-printable upgrades and mods available for the A1.

Photo of Andrew Cunningham

Andrew is a Senior Technology Reporter at Ars Technica, with a focus on consumer tech including computer hardware and in-depth reviews of operating systems like Windows and macOS. Andrew lives in Philadelphia and co-hosts a weekly book podcast called Overdue.

What I learned from my first few months with a Bambu Lab A1 3D printer, part 1 Read More »

i-helped-a-lost-dog’s-airtag-ping-its-owner:-an-ode-to-replaceable-batteries

I helped a lost dog’s AirTag ping its owner: An ode to replaceable batteries

Out of all the books I read for my formal education, one bit, from one slim paperback, has lodged the deepest into my brain.

William Blundell’s The Art and Craft of Feature Writing offers a “selective list of what readers like.” It starts with a definitive No. 1: “Dogs, followed by other cute animals and well-behaved small children.” People, Blundell writes, are your second-best option, providing they are doing or saying something interesting.

I have failed to provide Ars Technica readers with a dog story during nearly three years here. Today, I intend to fix that. This is a story about a dog, but also a rare optimistic take on a ubiquitous “smart” product, one that helped out a very good girl.

Note: The images in this post are not of the aforementioned dog, so as to protect their owner’s privacy. The Humane Rescue Alliance of Washington, DC, provided photos of adoptable dogs with some resemblance to that dog.

Hello, stranger

My wife and I were sitting with our dog on our front porch on a recent weekend morning. We were drinking coffee, reading, and enjoying DC’s tiny window of temperate spring weather. I went inside for a moment; when I came back, my dog was inside, but my wife was not. Confused, I cracked open the door to look out. A dog, not my own, stuck its nose into the door gap, eager to sniff me out.

“There’s a dog here?” my wife said, partly to herself. “She just ran up on the porch. I have no idea where she came from.”

Rexi, a pitbull leaning to the right, onto someone wearing jeans.

Rexi, a nearly 3-year-old mixed breed, is being fostered and ready for adoption at the Humane Rescue Alliance. The author’s wife thinks Rexi looks the most like their unexpected dog visitor.

Rexi, a nearly 3-year-old mixed breed, is being fostered and ready for adoption at the Humane Rescue Alliance. The author’s wife thinks Rexi looks the most like their unexpected dog visitor. Credit: Humane Rescue Alliance

I secured my dog inside, then headed out to meet this fast-moving but friendly interloper. She had a collar, but no leash, and looked well-groomed, healthy, and lightly frantic. The collar had a silicone band on it, holding one of Apple’s AirTags underneath. I pulled out the AirTag, tapped it against my phone, and nothing happened.

While my wife posted on our neighborhood’s various social outlets (Facebook, Nextdoor, and a WhatsApp group for immediate neighbors), I went into the garage and grabbed a CR2032 battery. That’s not something everyone has, but I have a few AirTags, along with a bit of a home automation habit. After some pressing, twisting, and replacing, the AirTag beeped and returned to service.

I helped a lost dog’s AirTag ping its owner: An ode to replaceable batteries Read More »

silverstone-is-back-with-a-beige-pc-case-that-looks-just-like-your-crappy-old-486

SilverStone is back with a beige PC case that looks just like your crappy old 486

SilverStone’s first ’80s throwback PC case started life as an April Fools’ joke, but the success of the FLP01 was apparently serious enough to merit a follow-up. The company brought another beige case to the Computex trade show this week, the vertically oriented FLP02 (via Tom’s Hardware).

If the original horizontally oriented FLP01 case called to mind a 386-era Compaq Deskpro, the FLP02 is a dead ringer for the kind of case you might have gotten for a generic 486 or early Pentium-era PC. That extends to having a Turbo button built into the front—on vintage PCs, this button could actually determine how fast the processor was allowed to run, though here, it’s actually a fan speed control instead. A lock on the front also locks the power switch in place to keep it from being flipped off accidentally, something else real vintage PCs actually did.

Despite its retro facade, the FLP02 is capable of fitting in even higher-end modern PC parts than the original FLP01. Front USB-A and USB-C ports are hidden behind a magnetic door on the front of the case, and its faux-5.25-inch floppy drives are just covers for drive bays that you could use for an optical drive or extra front I/O.

Despite its retro looks, the FLP02 still tucks away support for modern amenities like front-facing USB-A and USB-C ports. Credit: Future

On the inside, the case can fit full-size ATX motherboards and up to a 360 mm radiator for CPU cooling, and modern high-end GPUs like the GeForce RTX 5090 or 5080 should be able to fit inside.

SilverStone says the FLP02 will ship in Q3 or Q4 of this year and that US buyers should be able to get it for $220. You can, of course, buy a modern high-end PC case for much less money. But if this kind of nostalgia-bait didn’t move merchandise, companies wouldn’t keep indulging in it.

SilverStone is back with a beige PC case that looks just like your crappy old 486 Read More »

amd’s-$299-radeon-rx-9060-xt-brings-8gb-or-16gb-of-ram-to-fight-the-rtx-5060

AMD’s $299 Radeon RX 9060 XT brings 8GB or 16GB of RAM to fight the RTX 5060

AMD didn’t provide much by way of performance comparisons, but it’s promising that the cards have the same number of compute units as AMD’s last-generation RX 7600 series. AMD says that RDNA 4 compute units are much faster than those used for RDNA 3, particularly in games with ray-tracing effects enabled. This helped make the Radeon RX 9070 cards generally as fast or faster than the RX 7900 XTX and 7900 XT series, despite having around two-thirds as many compute units. Sticking with 32 CUs for the 9060 series isn’t exciting on paper, but we should still see a respectable generation-over-generation performance bump. The RX 7600 series, by contrast, provided a pretty modest performance improvement compared to 2022’s Radeon RX 6650 XT.

AMD says that the cards’ total board power—the amount of power the entire graphics card, including the GPU itself, RAM, and other components—starts at 150 W for the 8GB card and 160 W for the 16GB card, with a maximum TBP of 182 W. That’s a shade higher than but generally comparable to the RTX 5060 and 5060 Ti, and (depending on where actual performance ends up) quite a bit more efficient than the RX 7600 series. This partly comes down to a more efficient 4nm TSMC manufacturing process, a substantial upgrade from the 6nm process used for the 7600 series.

It’s unusual for a GPU maker to define a TBP range—more commonly we’re just given a single default value. But this is in line with new settings we observed in our RX 9070 review; AMD officially supports a range of different user-selectable TBP numbers in its Catalyst driver package, and some GPU makers were shipping cards that used higher TBPs by default.

Higher power limits can increase performance, though usually the performance increase is disproportionately small compared to the increase in power draw. These power limits should also generally mean that most 9060 XTs can be powered with a single 8-pin power connector, rather than using multiple connectors or the 12-pin 12VHPWR/12V-2×6 connector.

AMD’s $299 Radeon RX 9060 XT brings 8GB or 16GB of RAM to fight the RTX 5060 Read More »

self-hosting-is-having-a-moment-ethan-sholly-knows-why.

Self-hosting is having a moment. Ethan Sholly knows why.

Self-hosting is having a moment, even if it’s hard to define exactly what it is.

It’s a niche that goes beyond regular computing devices and networks but falls short of a full-on home lab. (Most home labs involve self-hosting, but not all self-hosting makes for a home lab.) It adds privacy, provides DRM-free alternatives, and reduces advertising. It’s often touted as a way to get more out of your network-attached storage (NAS), but it’s much more than just backup and media streaming.

Is self-hosting just running services on your network for which most people rely on cloud companies? Broadly, yes. But take a look at the selfh.st site/podcast/newsletter, the r/selfhosted subreddit, and all the GitHub project pages that link to one another, and you’ll also find things that no cloud provider offers.

Ethan Sholly, proprietor of the selfh.st site, newsletter, and occasional podcast, recently walked me through the current state of self-hosting, and he shared some of the findings from his surveys of those people doing all that small-scale server administration.

“Turn your desktop on—it’s movie night”

Ethan Sholly headshot, in front of a blue bookshelf.

Ethan Sholly, proprietor of the selfh.st media mini-conglomerate.

Credit: Ethan Sholly

Ethan Sholly, proprietor of the selfh.st media mini-conglomerate. Credit: Ethan Sholly

Sholly works in finance, not tech, but he was a computer science minor with just enough knowledge to get Plex working on a desktop PC for his friends and family. “I’d get a call or text: ‘Can you turn your desktop on—it’s movie night,'” Sholly said.

He gradually expanded to building his own tower server with 10 terabyte drives. Once he had his media-serving needs covered, the question inevitably became “What else can I self-host?” He dug in, wandered around, and found himself with tons of bookmarked GitHub repos and project pages.

Sholly, a self-professed “old-school RSS junkie,” wanted one place to find the most commonly recommended apps and news about their changes and updates. It didn’t exist, so he assembled it, coded it, and shared it. He also started writing about the scene in his newsletter, which has more personality and punch than you’d expect from someone in a largely open source, DIY-minded hobby.

After Plex increased subscription prices and changed its business model in March, Sholly wrote in his newsletter that, while there were valid concerns about privacy and future directions, it would be a good time to note something else: The majority of people don’t donate to a single self-hosted project.

Self-hosting is having a moment. Ethan Sholly knows why. Read More »

gemini-2.5-is-leaving-preview-just-in-time-for-google’s-new-$250-ai-subscription

Gemini 2.5 is leaving preview just in time for Google’s new $250 AI subscription

Deep Think graphs I/O

Deep Think is more capable of complex math and coding. Credit: Ryan Whitwam

Both 2.5 models have adjustable thinking budgets when used in Vertex AI and via the API, and now the models will also include summaries of the “thinking” process for each output. This makes a little progress toward making generative AI less overwhelmingly expensive to run. Gemini 2.5 Pro will also appear in some of Google’s dev products, including Gemini Code Assist.

Gemini Live, previously known as Project Astra, started to appear on mobile devices over the last few months. Initially, you needed to have a Gemini subscription or a Pixel phone to access Gemini Live, but now it’s coming to all Android and iOS devices immediately. Google demoed a future “agentic” capability in the Gemini app that can actually control your phone, search the web for files, open apps, and make calls. It’s perhaps a little aspirational, just like the Astra demo from last year. The version of Gemini Live we got wasn’t as good, but as a glimpse of the future, it was impressive.

There are also some developments in Chrome, and you guessed it, it’s getting Gemini. It’s not dissimilar from what you get in Edge with Copilot. There’s a little Gemini icon in the corner of the browser, which you can click to access Google’s chatbot. You can ask it about the pages you’re browsing, have it summarize those pages, and ask follow-up questions.

Google AI Ultra is ultra-expensive

Since launching Gemini, Google has only had a single $20 monthly plan for AI features. That plan granted you access to the Pro models and early versions of Google’s upcoming AI. At I/O, Google is catching up to AI firms like OpenAI, which have offered sky-high AI plans. Google’s new Google AI Ultra plan will cost $250 per month, more than the $200 plan for ChatGPT Pro.

Gemini 2.5 is leaving preview just in time for Google’s new $250 AI subscription Read More »

adobe-to-automatically-move-subscribers-to-pricier,-ai-focused-tier-in-june

Adobe to automatically move subscribers to pricier, AI-focused tier in June

Subscribers to Adobe’s multi-app subscription plan, Creative Cloud All Apps, will be charged more starting on June 17 to accommodate for new generative AI features.

Adobe’s announcement, spotted by MakeUseOf, says the change will affect North American subscribers to the Creative Cloud All Apps plan, which Adobe is renaming Creative Cloud Pro. Starting on June 17, Adobe will automatically renew Creative Cloud All Apps subscribers into the Creative Cloud Pro subscription, which will be $70 per month for individuals who commit to an annual plan, up from $60 for Creative Cloud All Apps. Annual plans for students and teachers plans are moving from $35/month to $40/month, and annual teams pricing will go from $90/month to $100/month. Monthly (non-annual) subscriptions are also increasing, from $90 to $105.

Further, in an apparent attempt to push generative AI users to more expensive subscriptions, as of June 17, Adobe will give single-app subscribers just 25 generative AI credits instead of the current 500.

Current subscribers can opt to move down to a new multi-app plan called Creative Cloud Standard, which is $55/month for annual subscribers and $82.49/month for monthly subscribers. However, this tier limits access to mobile and web app features, and subscribers can’t use premium generative AI features.

Creative Cloud Standard won’t be available to new subscribers, meaning the only option for new customers who need access to many Adobe apps will be the new AI-heavy Creative Cloud Pro plan.

Adobe’s announcement explained the higher prices by saying that the subscription tier “includes all the core applications and new AI capabilities that power the way people create today, and its price reflects that innovation, as well as our ongoing commitment to deliver the future of creative tools.”

Like today’s Creative Cloud All Apps plan, Creative Cloud Pro will include Photoshop, Illustrator, Premiere Pro, Lightroom, and access to Adobe’s web and mobile apps. AI features include unlimited usage of image and vector features in Adobe apps, including Generative Fill in Photoshop, Generative Remove in Lightroom, Generative Shape Fill in Illustrator, and 4K video generation with Generative Extend in Premiere Pro.

Adobe to automatically move subscribers to pricier, AI-focused tier in June Read More »

google-to-give-app-devs-access-to-gemini-nano-for-on-device-ai

Google to give app devs access to Gemini Nano for on-device AI

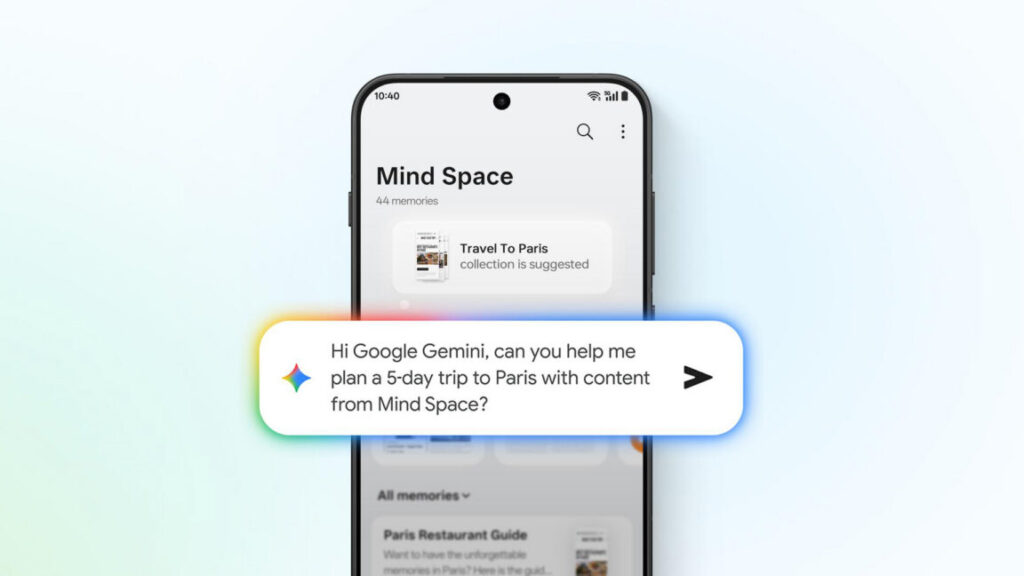
The rapid expansion of generative AI has changed the way Google and other tech giants design products, but most of the AI features you’ve used are running on remote servers with a ton of processing power. Your phone has a lot less power, but Google appears poised to give developers some important new mobile AI tools. At I/O next week, Google will likely announce a new set of APIs to let developers leverage the capabilities of Gemini Nano for on-device AI.

Google has quietly published documentation on big new AI features for developers. According to Android Authority, an update to the ML Kit SDK will add API support for on-device generative AI features via Gemini Nano. It’s built on AI Core, similar to the experimental Edge AI SDK, but it plugs into an existing model with a set of predefined features that should be easy for developers to implement.

Google says ML Kit’s GenAI APIs will enable apps to do summarization, proofreading, rewriting, and image description without sending data to the cloud. However, Gemini Nano doesn’t have as much power as the cloud-based version, so expect some limitations. For example, Google notes that summaries can only have a maximum of three bullet points, and image descriptions will only be available in English. The quality of outputs could also vary based on the version of Gemini Nano on a phone. The standard version (Gemini Nano XS) is about 100MB in size, but Gemini Nano XXS as seen on the Pixel 9a is a quarter of the size. It’s text-only and has a much smaller context window.

Not all versions of Gemini Nano are created equal.

Credit: Ryan Whitwam

Not all versions of Gemini Nano are created equal. Credit: Ryan Whitwam

This move is good for Android in general because ML Kit works on devices outside Google’s Pixel line. While Pixel devices use Gemini Nano extensively, several other phones are already designed to run this model, including the OnePlus 13, Samsung Galaxy S25, and Xiaomi 15. As more phones add support for Google’s AI model, developers will be able to target those devices with generative AI features.

Google to give app devs access to Gemini Nano for on-device AI Read More »

microsoft’s-surface-lineup-reportedly-losing-another-of-its-most-interesting-designs

Microsoft’s Surface lineup reportedly losing another of its most interesting designs

Like the Surface Studio desktop, the Laptop Studio’s odd and innovative exterior was rendered less exciting by a high price and relatively underpowered interior. Before discounts, the Laptop Studio 2 starts at around $2,400 for a basic configuration with a 13th-generation Core i7 processor, 16GB of RAM, and 512GB of storage—integrated graphics and a fully loaded version with 64GB of RAM, a 2TB SSD, and a GeForce RTX 4060 GPU would normally run you over $4,300.

Though experimental Surface designs like the Book and Studio rarely delivered great value for the money, they were at least unique attempts at new kinds of PCs with extra features for designers, artists, and anyone else who could benefit from a big stylus-compatible touchscreen. Microsoft’s most influential PC design remains the Surface Pro itself, one of the few tablet PC design templates to outlast the Windows 8 era. It makes sense for Microsoft (or any PC company) to play it safe with established designs, but it does make the PC industry just a little less interesting.

Microsoft’s Surface lineup reportedly losing another of its most interesting designs Read More »